CanSat NeXT GNSS Module
CanSat NeXT GNSS module extends CanSat NeXT with location tracking and precise real time clock capabilities. The module is based on U-Blox SAM-M10Q GNSS receiver by U-Blox.
Hardware
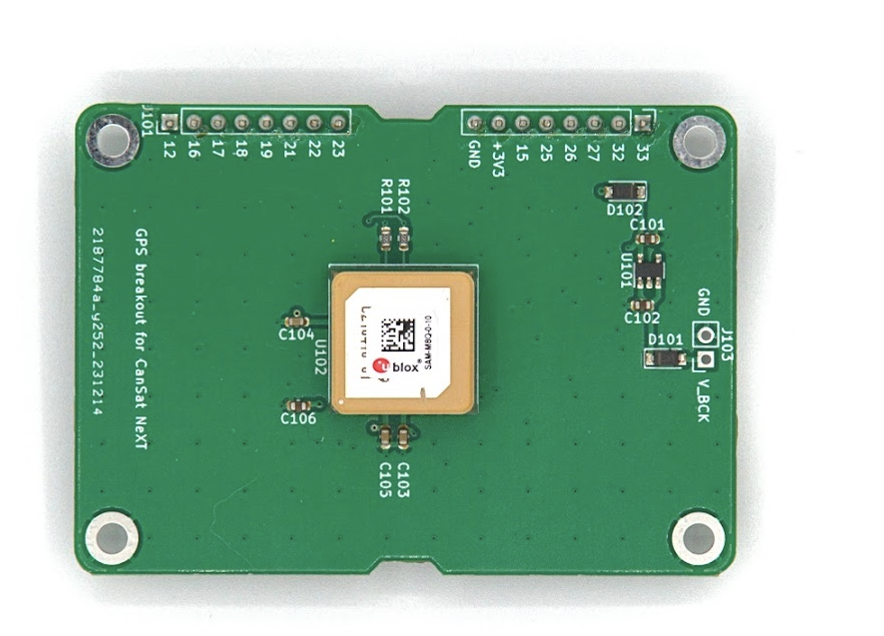
The module connects the GNSS receiver to the CanSat NeXT through the UART in the extension header. The device uses extension header pins 16 and 17 for UART RX and TX, and also takes the power supply from the +3V3 line in the extension header.
By default, the back-up registers of the GNSS module are powered from the +3V3 line. While this makes the module easy to use, it means that the module has to always start from scratch when trying to find a fix. To mitigate this, it is possible to provide an external power source through the backup voltage line through J103 headers. The voltage provided to the V_BCK pin should be 2-6.5 volts, and the current draw is constant 65 microamperes, even when the main power is switched off. Supplying the back-up voltage enables the GNSS receiver to maintain all settings, but also crucially the almanac and ephemeris data - reducing the time to obtain fix from ~30 seconds to 1-2 seconds if the device hasn't moved significantly between power switches.
There are many other GNSS breakouts and modules available from companies such as Sparkfun and Adafruit, among others. These can be connected to CanSat NeXT through the same UART interface, or using SPI and I2C, depending on the module. CanSat NeXT library should also support other breakouts that use U-blox modules. When looking for GNSS breakouts, try to find one where the base PCB is as large as possible - most feature too small PCBs, which makes their antenna performance very weak compared to modules with larger PCBs. Any size smaller than 50x50 mm will start to hinder the performance and ability for find and maintain a fix.
For more information about the GNSS module and the large number of settings and features available, check the datasheet of the GNSS receiver from U-Blox website.
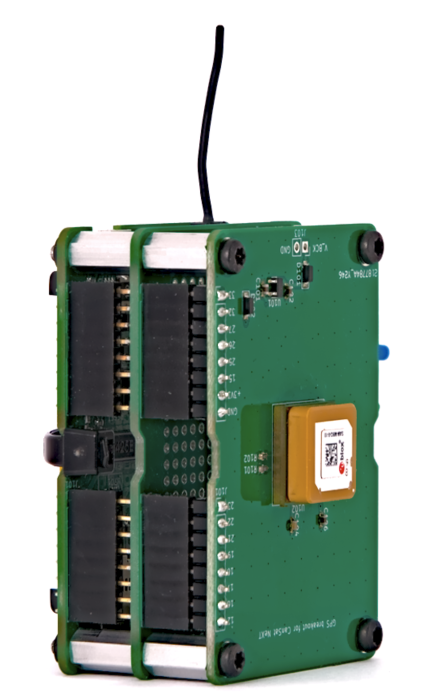
The hardware integration of the module to CanSat NeXT is really simple - after adding standoffs to the screw holes, carefully insert the header pins into the pin sockets. If you intend to make a multi-layer electronic stack, make sure to place the GNSS as the top-most module to allow
Software
The easiest way to get started using the CanSat NeXT GNSS is with our own Arduino library, which you can find from the Arduino library manager. For instructions on how to install the library, refer to the getting started page.
The library includes examples on how to read the position and current time, as well as how to transmit the data with CanSat NeXT.
One quick note about the settings - the module needs to be told as to what kind of environment it will be used in, so it can best approximate the position of the user. Typically, the assumption is that the user will be at ground level, and while they may be moving, the acceleration is probably not very high. This is of course not the case with CanSats, which might be launched with rockets, or hit the ground with rather high velocities. Therefore, the library sets by default the position to be calculated assuming high dynamic environment, which allows the fix to be maintained at least somewhat during rapid acceleration, but it also makes the position on ground notably less precise. If instead high accuracy once landed is more desirable, you can initialize the GNSS module with command GNSS_init(DYNAMIC_MODEL_GROUND), replacing the default GNSS_init(DYNAMIC_MODEL_ROCKET) = GNSS_init(). Additionally, there is DYNAMIC_MODEL_AIRBORNE, which is slightly more accurate than the rocket model, but assumes only modest acceleration.
This library prioritizes ease-of-use, and only has basic functionalities such as getting location and time from the GNSS. For users looking for more advanced GNSS features, the excellent SparkFun_u-blox_GNSS_Arduino_Library might be a better choice.
Library specification
Here are the available commands from the CanSat GNSS library.
GNSS_Init
| Function | uint8_t GNSS_Init(uint8_t dynamic_model) |
|---|---|
| Return Type | uint8_t |
| Return Value | Returns 1 if initialization was successful, or 0 if there was an error. |
| Parameters | |
uint8_t dynamic_model | |
| This chooses the dynamic model, or the environment the GNSS module assumes. Possible choices are DYNAMIC_MODEL_GROUND, DYNAMIC_MODEL_AIRBORNE and DYNAMIC_MODEL_ROCKET. | |
| Description | This command initializes the GNSS module, and you should call this in the setup function. |
readPosition
| Function | uint8_t readPosition(float &x, float &y, float &z) |
|---|---|
| Return Type | uint8_t |
| Return Value | Returns 0 if measurement was successful. |
| Parameters | |
float &latitude, float &longitude, float &altitude | |
float &x: Address of a float variable where the data will be stored. | |
| Used in example sketch | All |
| Description | This function can be used to read the position of the device as coordinates. The values will be semi-random before the fix is obtained. The altitude is meters from sea-level, although it is not very accurate. |
getSIV
| Function | uint8_t getSIV() |
|---|---|
| Return Type | uint8_t |
| Return Value | Number of satellites in view |
| Used in example sketch | AdditionalFunctions |
| Description | Returns the number of satellites in view. Typically values below 3 indicate no fix. |
getTime
| Function | uint32_t getTime() |
|---|---|
| Return Type | uint32_t |
| Return Value | Current Epoch time |
| Used in example sketch | AdditionalFunctions |
| Description | Returns the current epoch-time, as indicated by the signals from GNSS satellites. In other words, this is the number of seconds elapsed since 00:00:00 UTC, Thursday the first of January 1970. |