Lesson 1: Hello World!
This first lesson shows gets you started with CanSat NeXT by showing how to write and run your first program on the board.
After this lesson, you will have the necessary tools to start developing software for your CanSat.
Installing the tooling
CanSat NeXT is recommended to be used with Arduino IDE, so let's begin by installing that and the necesssary libraries and boards.
Install Arduino IDE
If you haven’t already, download and install the Arduino IDE from the official website https://www.arduino.cc/en/software.
Add ESP32 support
CanSat NeXT is based on the ESP32 microcontroller, which is not included in the Arduino IDE default installation. If you haven’t used ESP32 microcontrollers with Arduino before, the support for the board needs to be installed first. It can be done in Arduino IDE from Tools->board->Board Manager (or just press (Ctrl+Shift+B) anywhere). In the board manager, search for ESP32, and install the esp32 by Espressif.
Install Cansat NeXT library
The CanSat NeXT library can be downloaded from the Arduino IDE's Library Manager from Sketch > Include Libraries > Manage Libraries.
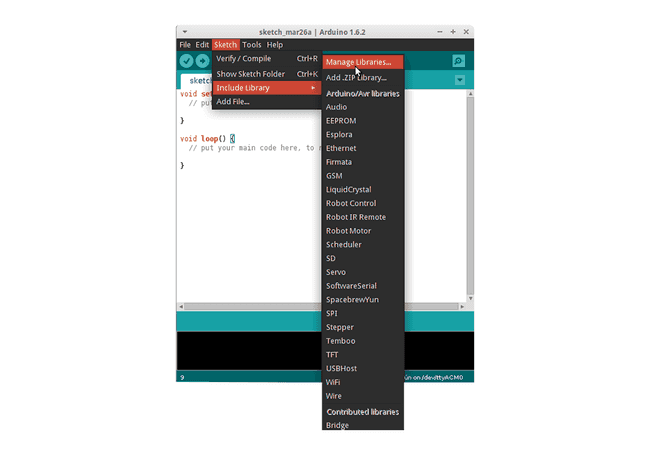
Image source: Arduino Docs, https://docs.arduino.cc/software/ide-v1/tutorials/installing-libraries
In the Library Manager search bar, type "CanSatNeXT" and choose "Install". If the IDE asks if you want to also install the dependencies, click yes.s
Connecting to PC
After installing the CanSat NeXT software library, you can plug in the CanSat NeXT to your computer. In case it is not detected, you may need to install the necessary drivers first. The driver installation is done automatically in most cases, however, on some PCs it needs to be done manually. Drivers can be found on the Silicon Labs website: https://www.silabs.com/developers/usb-to-uart-bridge-vcp-drivers For additional help with setting up the ESP32, refer to the following tutorial: https://docs.espressif.com/projects/esp-idf/en/latest/esp32/get-started/establish-serial-connection.html
Running your first program
Now, let's use the freshly installed libraries to start running some code on the CanSat NeXT. As is tradition, let's begin by blinking the LED and writing "Hello World!" to the computer.
Selecting the correct port
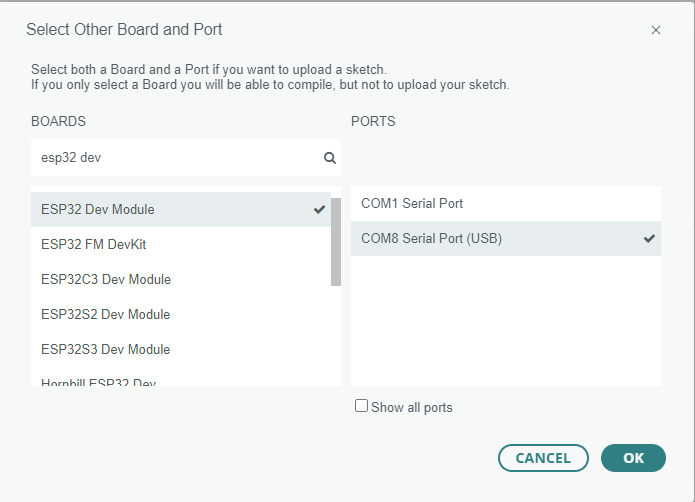
After plugging the CanSat NeXT into your computer (and turning the power on), you need select the correct port. If you don't know which one is the correct one, simply unplug the device and see which port disappears.
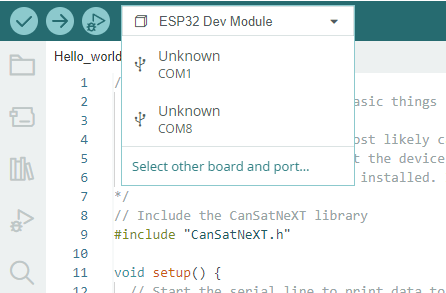
Arduino IDE now prompts your for the device type. Select ESP32 Dev Module.
Choosing an example
The CanSat NeXT library has several example codes showing how to use the various features on the board. You can find these example sketches from File -> Examples -> CanSat NeXT. Pick "Hello_world".
After opening the new sketch, you can upload it to the board by pressing the upload-button.
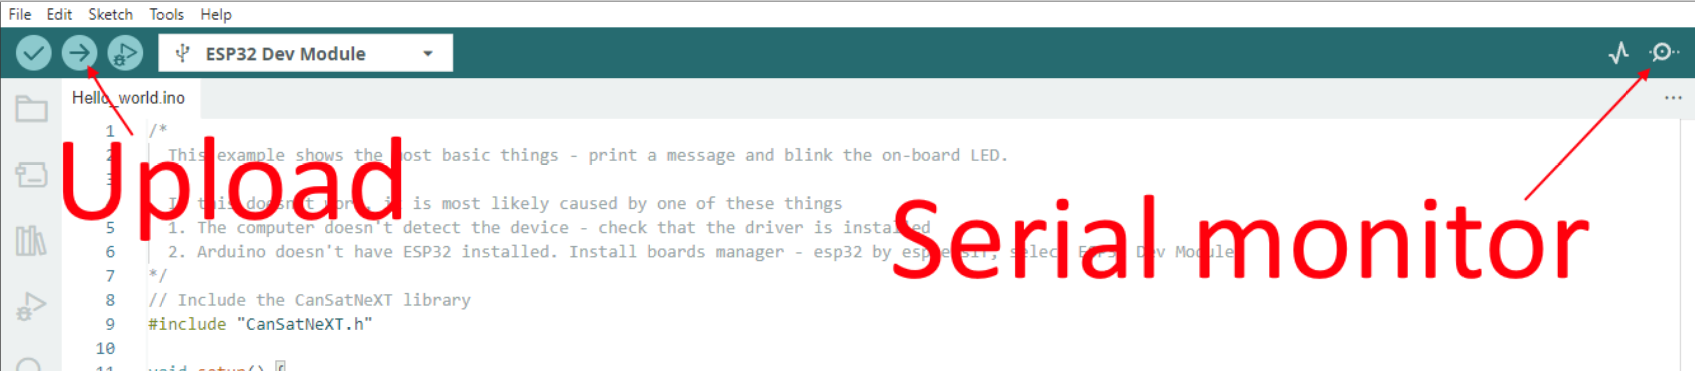
After a while, the LED on the board should start blinking. Additionally, the device is sending a message to the PC. You can see this by opening the serial monitor, and choosing the baud rate 115200.
Try also to press the button on the board. It should reset the processor, or in other words, restart the code from the beginning.
Hello World explained
Let's see what actually happens in this code by going through it line by line. First, the code begins by including the CanSat library. This line should be at the beginning of almost all of the programs written for CanSat NeXT, as it tells the compiler that we want to use the features from the CanSat NeXT library.
#include "CanSatNeXT.h"
After this, the code jumps to the setup function. There we have two calls - first, serial is the interface that we use to send messages to the PC via USB. The number inside the function call, 115200, refers to the baud-rate, i.e. how many ones and zeros are sent each second. The next call, CanSatInit(), is from the CanSat NeXT library and it initiates all of the on-board sensors and other features. Similar to the #include command, this is usually found in skethes for CanSat NeXT. Anything you'd like to be run just once on startup should included in the setup-function.
void setup() {
  // Start the serial line to print data to the terminal
  Serial.begin(115200);
  // Start all CanSatNeXT on-board systems.
  CanSatInit();
}
After the setup, the code starts repeating the loop function endlessly. First, the program writes the output pin LED to be high, i.e. have a voltage of 3.3 volts. This turns on the on-board LED. After 100 milliseconds, the voltage on that output pin is turned back to zero. Now the program waits for 400 ms, and then sends a message to the PC. After the message is sent, the loop function starts again from the beginning.
void loop() {
  // Let's blink the LED
  digitalWrite(LED, HIGH);
  delay(100);
  digitalWrite(LED, LOW);
  delay(400);
  Serial.println("This is a message!");
}
You can also try to change the delay values or the message to see what happens. Congratulations for getting this far! Setting up the tooling can be tricky, but it should get more fun from this point onwards.
In the next lesson, we will start reading data from the on-board sensors.